Xholon WebRTC Apps
WebRTC (Web Real-Time Communication) is a peer-to-peer technology that directly connects browser applications. WebRTC support is built into Google Chrome, Mozilla Firefox, and other modern browsers which I have not yet tested.
This web page describes my initial test and demo of WebRTC, using 2 Xholon apps, with each app running in its own web page. I live in the province of Ontario in Canada, and I began putting this experiment together while visiting a friend in St. Gallen canton in Switzerland (Schweiz). The demo is based on exchanging text messages between Canadian province objects and Swiss canton objects. I use the PeerJS JavaScript client library to simplify my interactions with WebRTC, and I also use the PeerJS signaling server to help set up the connections between browsers. Xholon is an open-source project with a github repository.
Quick Test
Open this, and then this in separate new browser tabs or windows, and observe the exchange of messages between the two browser-based apps.
Demo - Step 1 - Start Canada app
Start the Canada app in Firefox or Chrome. Alternatively, you can edit the localid parameters below, and drag, or copy and paste, the result into a browser URL line.
http://www.primordion.com/Xholon/gwt/XholonWebRTC.html?app=d6eada52b8a14384ebdec837f7356ba7&src=gist&gui=none&localid0=Able101&localid1=Baker101&localid2=Charlie101
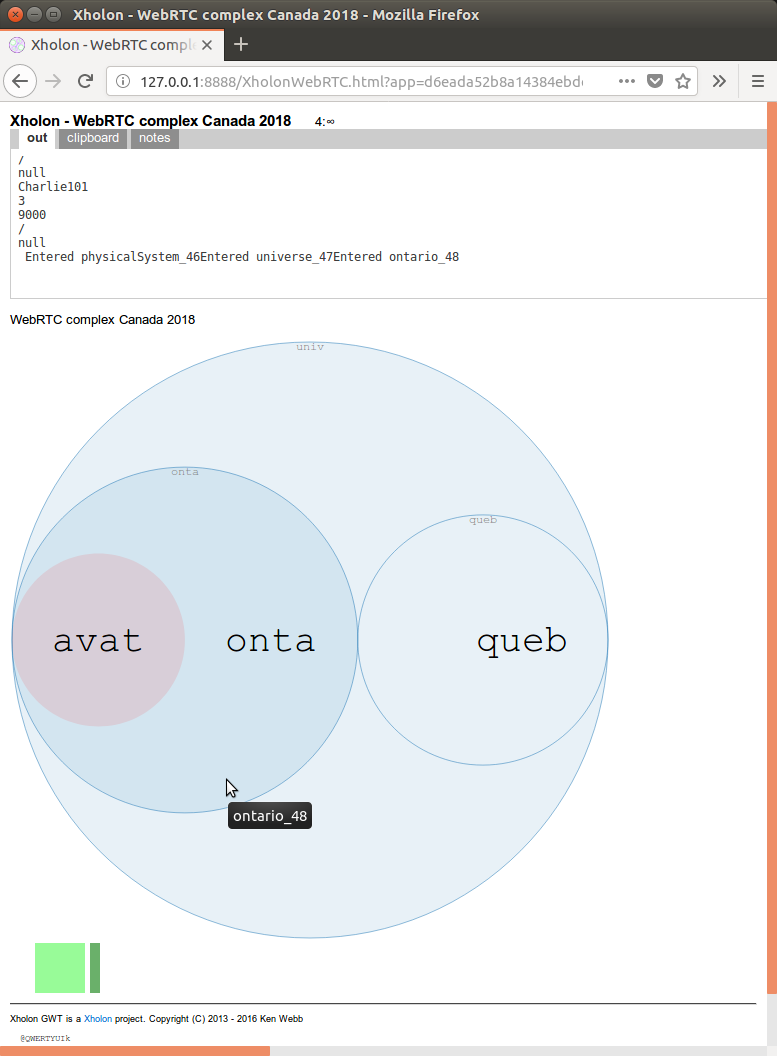
The resulting page should look similar to the following. The GUI includes a D3 Circle Packing (d3cp) animated SVG-based visualization, with abbreviated names inside each circle.
Demo - Step 2 - Start Schweiz app
Start the Schweiz app in another Firefox or Chrome page. This second page can use the same browser as the first page (Chrome or Firefox)), or a different browser, and it can run on the same computer or on a different computer. Alternatively, you can edit the remoteid parameters below, and drag, or copy and paste, the result into a browser URL line. Note that the value for remoteid0 must match the value for localid0 in the Canada app, and the same for the other IDs.
http://www.primordion.com/Xholon/gwt/XholonWebRTC.html?app=9c111d1ffac80a6905964d9433a532b7&src=gist&gui=none&remoteid0=Able101&remoteid2=Charlie101
Once this second page has loaded, the two apps should start to exchange regular test messages, as shown in the following.
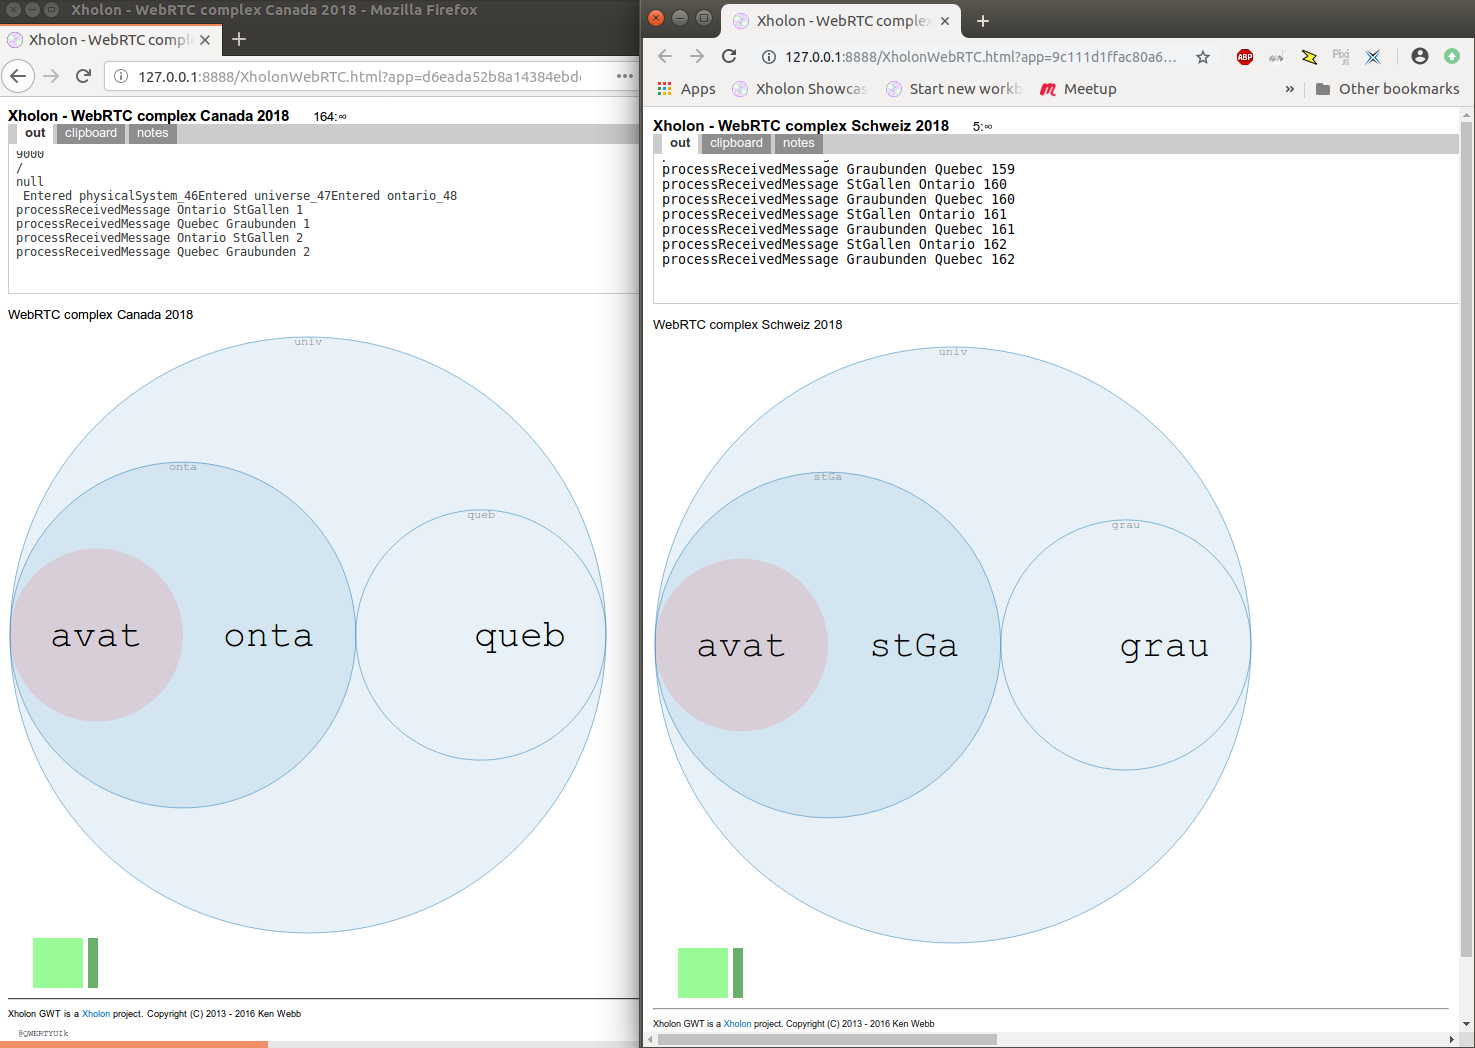
Note that each app includes an Avatar, displayed in a light reddish color inside the Ontario object and inside the StGallen object. You can instruct an Avatar to move between the two apps, and perform various actions along the way.
Demo - Step 3 - Exchange Gifts between the apps
Paste the following script into either Avatar. The easiest way to do this is to highlight the entire text starting with <script> and ending with </script>, drag this to the running app, and drop it directly on the Avatar object.
<script>
var a = this.parent();
a.action("script;\nbuild Gift;\ntake gift;\ngo port0;\nlook;\ndrop gift;\ngo port0;\n");
</script>
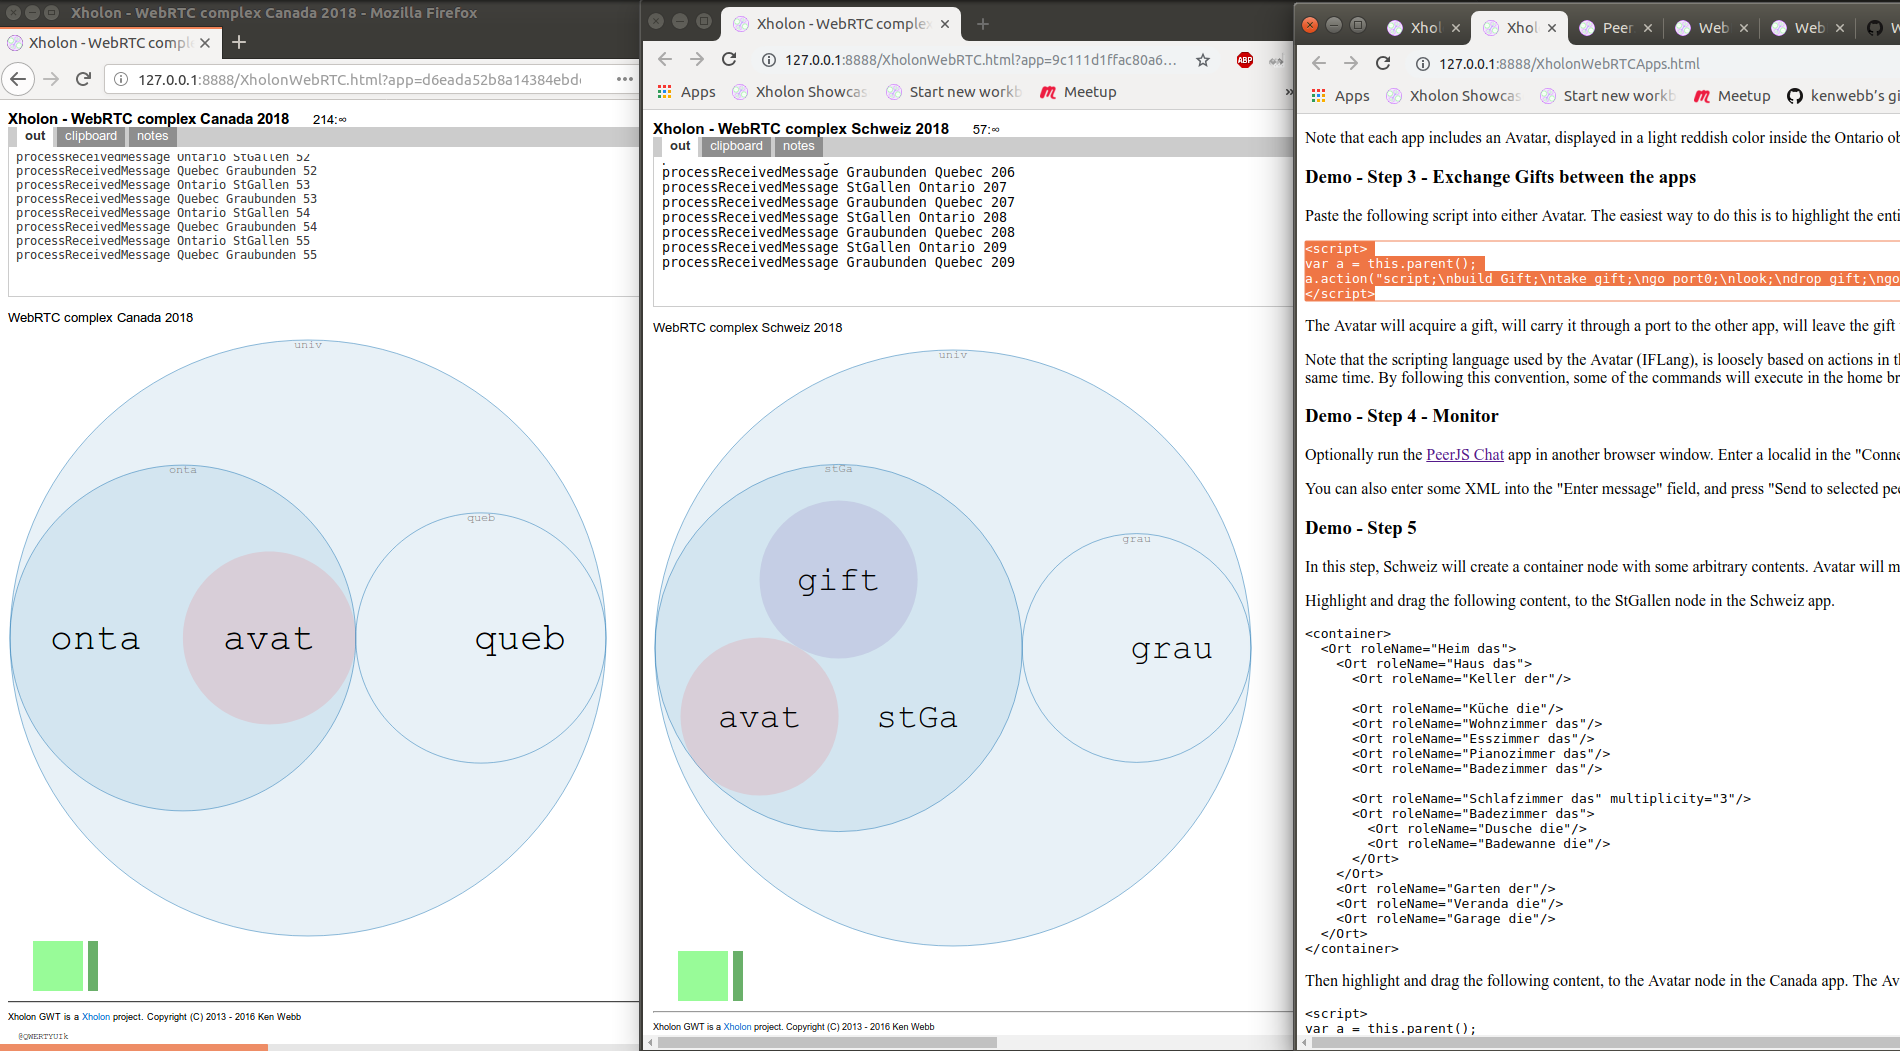
The Avatar will acquire a gift, will carry it through a port to the other app, will leave the gift there, and will then return home. All of this activity will animate within the two D3 Circle Packing (d3cp) GUIs.
Note that the scripting language used by the Avatar (IFLang), is loosely based on actions in the Inform 6 interactive fiction (IF) language. In a distributed environment, Avatar commands must be separated using "\n" so that they will be executed at subsequent timesteps rather than all at the same time. By following this convention, some of the commands will execute in the home browser, and others will execute in the remote browser.
As shown in the following image, the script was dropped on the Avatar in Ontario in Canada, and ended up in StGallen in Schweiz.
Demo - Step 4 - Monitor
Optionally run the PeerJS Chat app in another browser window. Enter a localid in the "Connect to a peer:" field, for example enter Baker101 and press "Connect", to monitor that object.
You can also enter some XML into the "Enter message" field, and press "Send to selected peers". For example, <One> will create a new object of type One in the monitored app. <One><Two/><Three/></One> will create a small subtree with Two and Three objects inside a One container. Each line below includes some separate content that can be sent to the peer.
<Orange><Color>orange</Color></Orange>
<Attribute_String>How are things on the other side?</Attribute_String>
<Four><Anno>Four is a fantastic number. It's twice as wonderful as two!</Anno></Four>
Demo - Step 5
In this step, Schweiz will create a container node with some arbitrary contents. Avatar will move from Canada to Schweiz, will take a container node, will return to Canada, and will smash the container to reveal the contents. As you can see, I was trying to learn some German.
Highlight and drag the following content, to the StGallen node in the Schweiz app.
<container>
  <Ort roleName="Heim das">
    <Ort roleName="Haus das">
      <Ort roleName="Keller der"/>

      <Ort roleName="Küche die"/>
      <Ort roleName="Wohnzimmer das"/>
      <Ort roleName="Esszimmer das"/>
      <Ort roleName="Pianozimmer das"/>
      <Ort roleName="Badezimmer das"/>

      <Ort roleName="Schlafzimmer das" multiplicity="3"/>
      <Ort roleName="Badezimmer das">
        <Ort roleName="Dusche die"/>
        <Ort roleName="Badewanne die"/>
      </Ort>
    </Ort>
    <Ort roleName="Garten der"/>
    <Ort roleName="Veranda die"/>
    <Ort roleName="Garage die"/>
  </Ort>
</container>
Then highlight and drag the following content, to the Avatar node in the Canada app. The Avatar will take the container with all of its contents, and move it back to its home where it will remove (smash) the outer container.
<script>
var a = this.parent();
a.action("script;\ngo port0;\ntake container;\ngo port0;\ndrop container;\nsmash container;\n");
</script>
OR you can have the Avatar just take a clone, and leave the original intact.
<script>
var a = this.parent();
a.action("script;\ngo port0;\ntakeclone container;\ngo port0;\ndrop container;\nsmash container;\n");
</script>
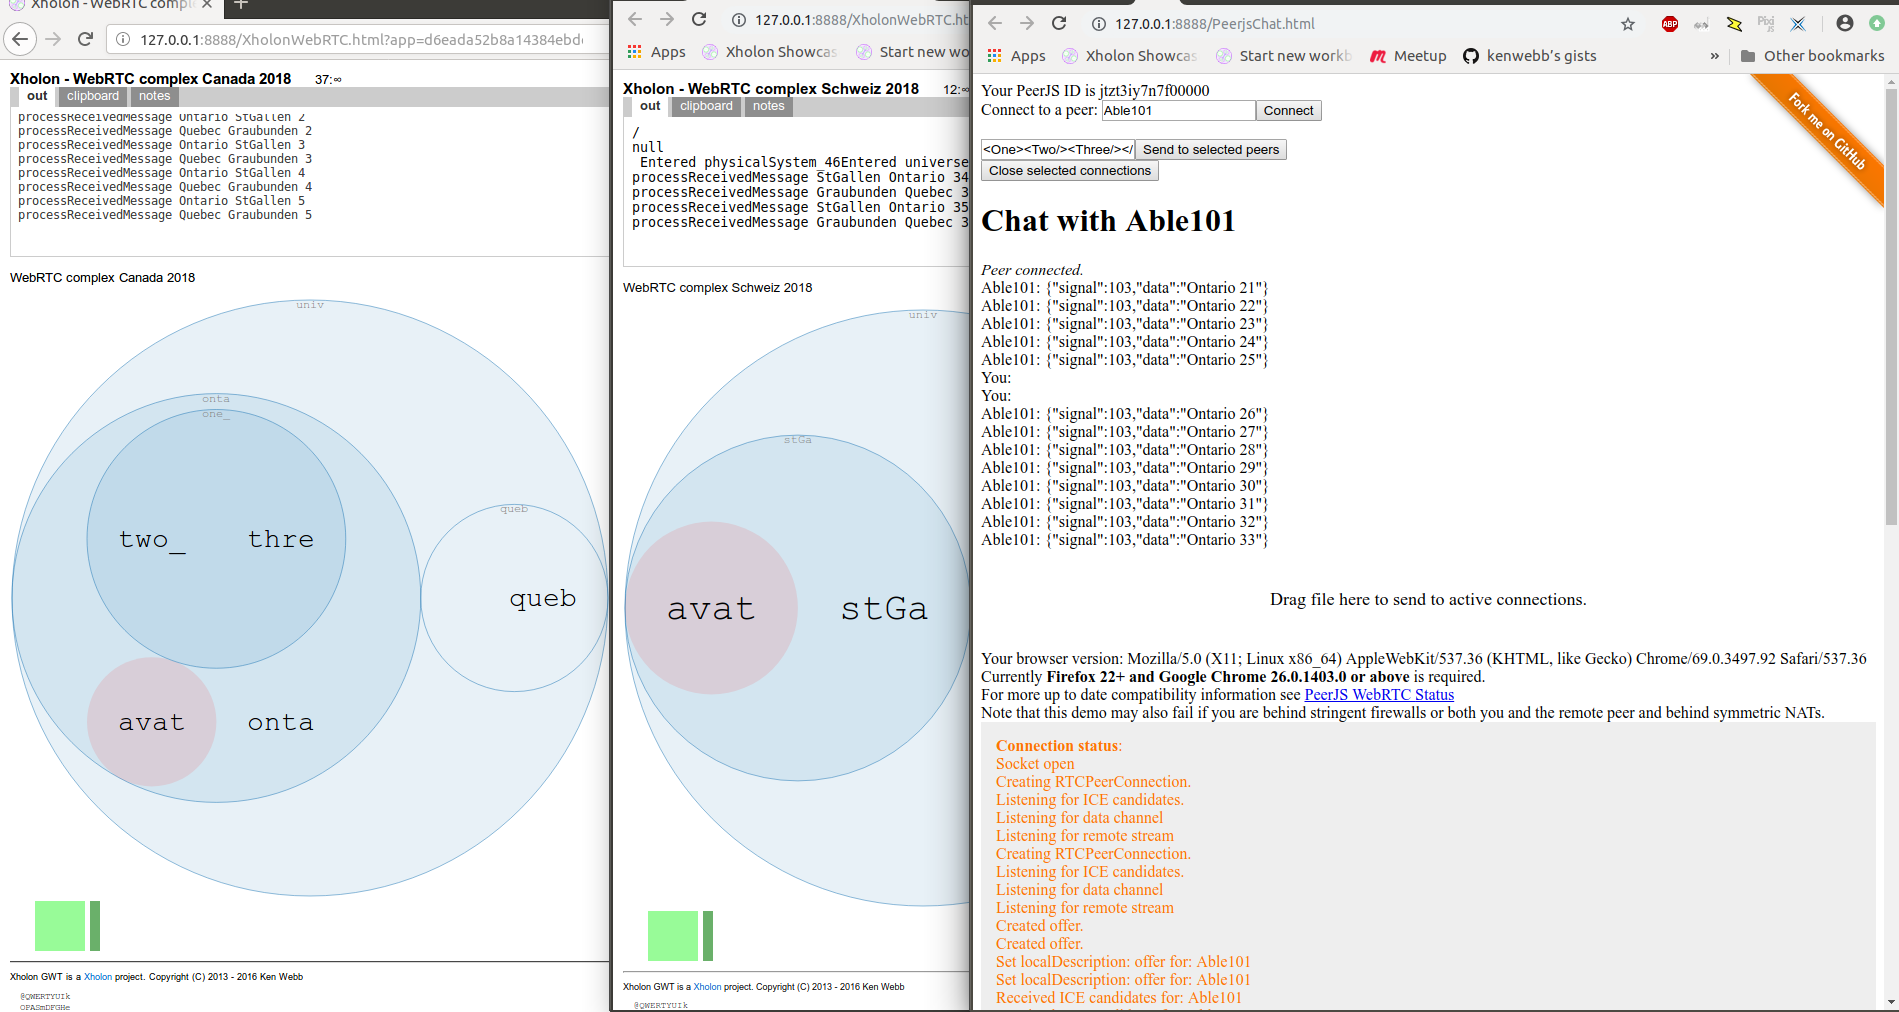
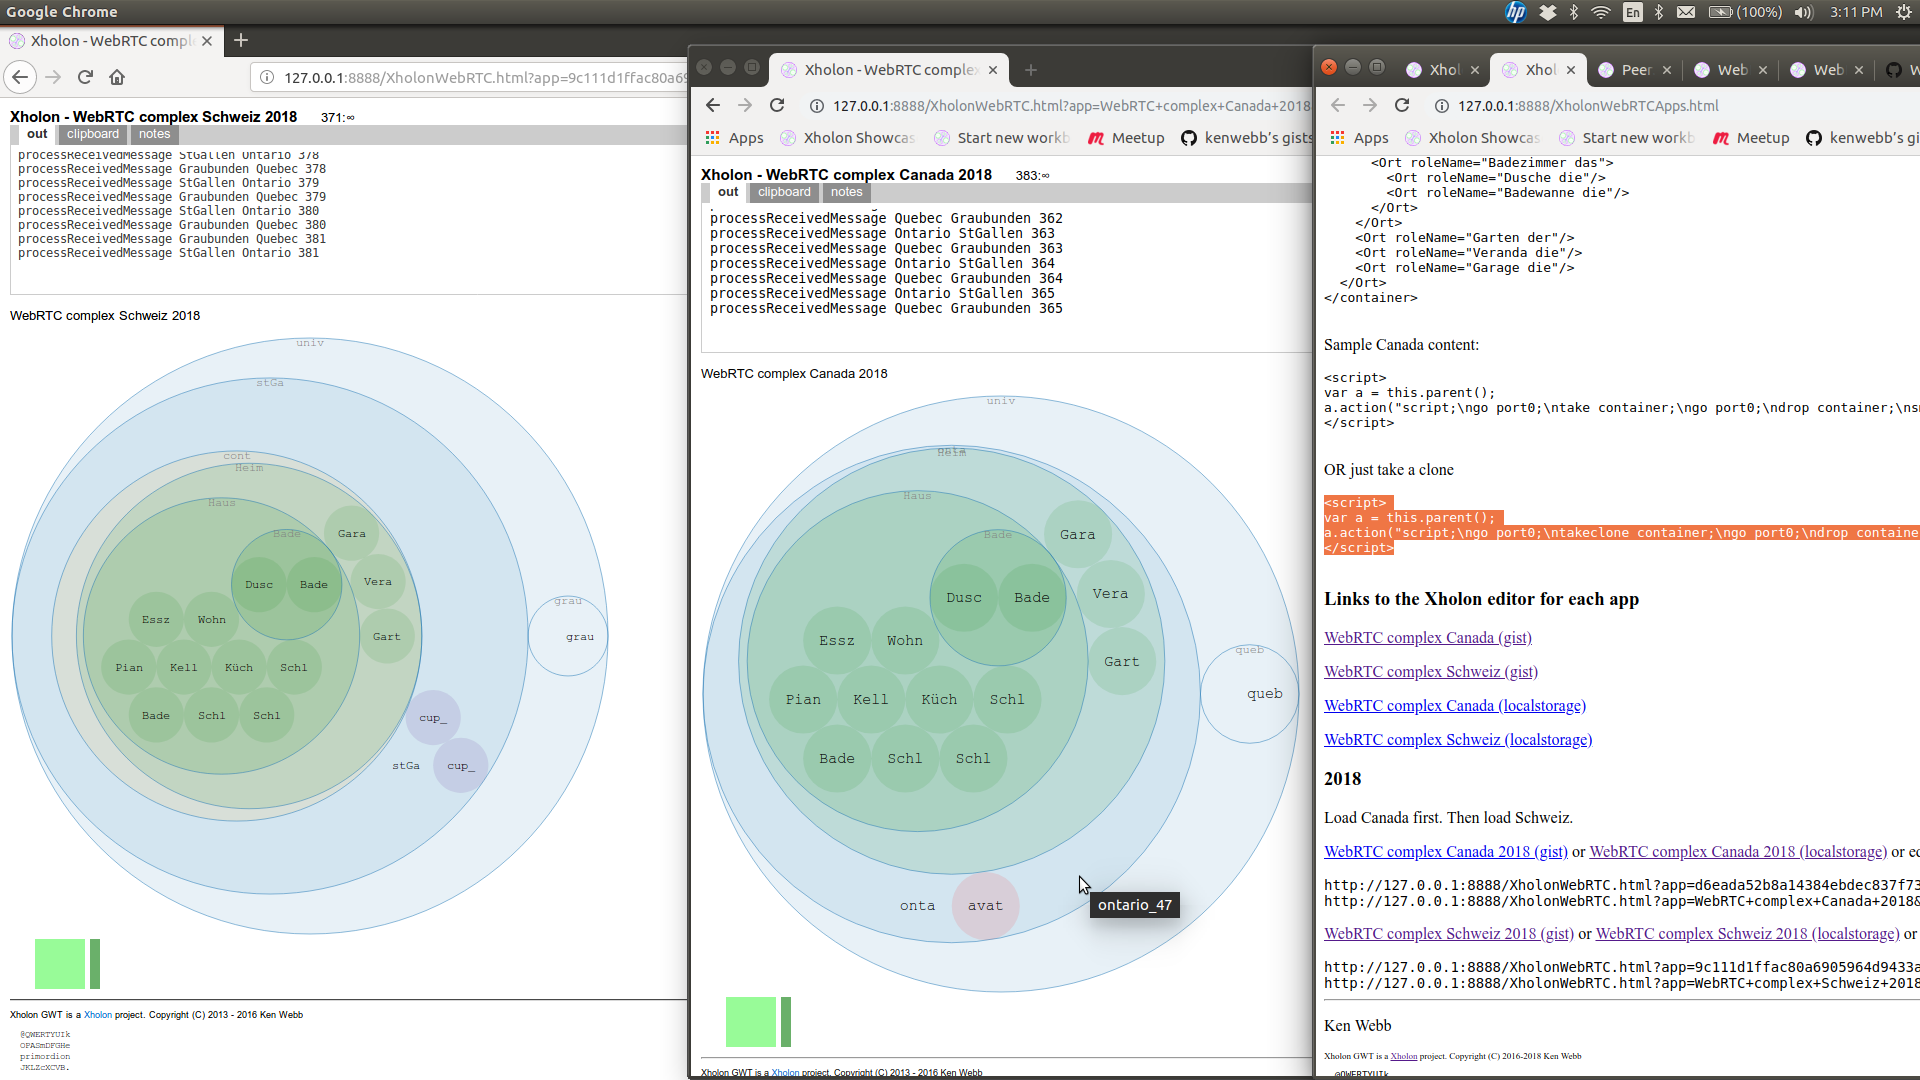
This final screenshot shows parts of three browser windows.
The left window is the "Schweiz" app running in Firefox.
The center window is the "Canada" app running in Google Chrome.
The right window is an early version of this web page, with highlighted "orange" content about to be added to one of the other two windows.
Developer Links
I test the Xholon software using a local server. I'm including these additional URLs for my own convenience.
Canada
WebRTC complex Canada 2018 (localstorage)
http://127.0.0.1:8888/XholonWebRTC.html?app=WebRTC+complex+Canada+2018&src=lstr&gui=none&localid0=Able101&localid1=Baker101&localid2=Charlie101
http://127.0.0.1:8888/XholonWebRTC.html?app=d6eada52b8a14384ebdec837f7356ba7&src=gist&gui=none&localid0=Able101&localid1=Baker101&localid2=Charlie101
Schweiz
WebRTC complex Schweiz 2018 (localstorage)
http://127.0.0.1:8888/XholonWebRTC.html?app=WebRTC+complex+Schweiz+2018&src=lstr&gui=none&remoteid0=Able101&remoteid2=Charlie101
http://127.0.0.1:8888/XholonWebRTC.html?app=9c111d1ffac80a6905964d9433a532b7&src=gist&gui=none&remoteid0=Able101&remoteid2=Charlie101
Links to the Xholon editor for each app
WebRTC complex Canada 2018 (gist)
WebRTC complex Schweiz 2018 (gist)
WebRTC complex Canada 2018 (localstorage)
WebRTC complex Schweiz 2018 (localstorage)
Links to Xholon workbook at github for each app
WebRTC complex Canada 2018 (view at github)
WebRTC complex Schweiz 2018 (view at github)
Scenarios
Things that can be sent to another App include: the current IXholon inventory (and/or subtrees) of an Avatar, Avatar IFLang instructions, a Xholon <script as XML and JavaScript (security issues), text, JSON, JavaScript Object, etc./>
- App1 node sends displayable text to App2 node, for display in "out" tab or elsewhere.
- App1 system-Avatar (Avatar1) moves to App2, performing local actions within App1, and then remote actions within App2, and then local actions on return to App1. On return, it is still the same Avatar.
- App1 non-system-Avatar does the same thing as in the previous scenario.
- App2 system-Avatar does the same thing as in the previous scenarios.
- App1 Avatar and App2 Avatar interact with each other.
- Avatars or other nodes within App1 and App2 send messages to each other through webrtc.
- Chat page sends content String, XML String, and JSON content to a node in App1.
- Avatar1 moves to App2, does something, and stays there. User2 has Avatar1 do something, sends it back to App1, and has it do something else back there.
- Establish a ring of webrtc connections amongst at least three apps. Have Avatar1 continuously navigate the ring, possibly doing things along the way such as picking up items that local users may have created. Avatar1 could drop off certain types of items, or users along the way could take some of these items.
- Avatar1 delivers certain items to specific apps along its ring or route. Address items in some way, possibly using XML attributes, or Xholon IMessage nodes.
- Avatar1 moves to App2, queries a database (ex: IndexDB), returns home with the result, and does something with the result.
- Avatar1 explores a remote site, and returns with a map showing its discoveries.
- Avatar1 moves to App2, obtains a PNG image, returns with it, and displays it.
- Allow people to send text messages to each other.
- Play a d3cp "video" of what is happening at another site.
- Implement multi-player Island game using webrtc.
Islands Game with WebRTC
Run any or all of the following URLs, in separate browsers and/or on different computers.
http://www.primordion.com/Xholon/gwt/XholonWebRTC.html?app=40731e8f7a7ece0236e656fb24036e4a&apprev=17&src=gist&gui=none&hide=xhtop,xhtabs,xhsvg,xhfooter&localid0=Daniel101
http://www.primordion.com/Xholon/gwt/XholonWebRTC.html?app=40731e8f7a7ece0236e656fb24036e4a&apprev=17&src=gist&gui=none&hide=xhtop,xhtabs,xhsvg,xhfooter&localid0=Johann101
http://www.primordion.com/Xholon/gwt/XholonWebRTC.html?app=40731e8f7a7ece0236e656fb24036e4a&apprev=17&src=gist&gui=none&hide=xhtop,xhtabs,xhsvg,xhfooter&localid0=Jules101
Run each app for awhile, and then collect data by typing "$". Then press "p" to continue. Make sure you do this separately for each app.
Run the WebRTC Island Admin tool, on whatever browser and computer you want.
http://www.primordion.com/Xholon/gwt/XholonWebRTC.html?app=0c07551a85b220eb6fc7c8a8d2b6a10b&src=gist&gui=none&remoteid0=Daniel101&remoteid1=Johann101&remoteid2=Jules101
Drag the following script into the Avatar.
<script>
var a = this.parent();
a.action("script;\ngo port0;\ntakeclone dataExport;\ngo port0;\ndrop dataExport;\n");
</script>
The Avatar will vanish, and should return a short time later with the data in a "DataExport" node.
Move the Avatar to each of the other "Player" nodes, and drag the same script into the Avatar while it's there.
Canada and Schweiz on local peerjs server
Install and run the peerjs server. The following is what I did in my Linux terminal window.
cd ~/nodespace/peerjsserver/
npm install peer
node node_modules/.bin/peerjs --port 9000 --key peerjs
  Started PeerServer on ::, port: 9000, path: / (v. 0.2.10)
I have edited the Canada and Schweiz workbooks. In each of the Xholon port specifications, change the second "delete" to "localhost". That's all that needs to be changed. For example:
<port name="trop" index="0" connector="RemoteNodeService-PeerJS,localid0,delete,3,localhost,9000,/"/>
<port name="port" index="0" connector="RemoteNodeService-PeerJS,remoteid0,delete,3,localhost,9000,/"/>
I have edited the two workbooks to allow either the remote server or the localhost server. The localhost server will be selected if you specify "&ver=localhost" as part of the URL.
Run Canada and then Schweiz. For example:
WebRTC complex Canada 2018 (localstorage)
WebRTC complex Schweiz 2018 (localstorage)
I successfully tested it with Canada running in a Chrome browser, and Schweiz in Firefox.
Canada and Schweiz on heroku peerjs server
Install and run the peerjs server. The following is what I did in my Linux terminal window.
cd ~/nodespace
git clone https://github.com/kenwebb/xhpserver.git
cd xhpserver
- I edited package.json
- I created Procfile
git rm yarn.lock
npm install
node bin/peerjs --port 9000 --key peerjs
  Started PeerServer on ::, port: 9000, path: / (v. 0.2.92)

heroku local web
7:45:50 AM web.1 |  > peer@0.2.92 start /home/ken/nodespace/xhpserver
7:45:50 AM web.1 |  > bin/peerjs --port ${PORT:=9000} --path / --debug true
7:45:50 AM web.1 |  Started PeerServer on ::, port: 5000, path: / (v. 0.2.92)

heroku create xhpserver
Creating ⬢ xhpserver... done
https://xhpserver.herokuapp.com/ | https://git.heroku.com/xhpserver.git

git push heroku master
heroku ps:scale web=1
heroku open

heroku logs --tail
I have edited the Canada and Schweiz workbooks. In each of the Xholon workbooks, add a XML processing instruction (PI). That's all that needs to be changed. For example:
"herokuxhpeerjs":
  [
    {"op":"replace", "sel":"./Ontario/port/@connector", "content":"RemoteNodeService-PeerJS,localid0,delete,3,xhpserver.herokuapp.com,,/"},
    {"op":"replace", "sel":"./Ontario/port[2]/@connector", "content":"RemoteNodeService-PeerJS,localid1,delete,3,xhpserver.herokuapp.com,,/"},
    {"op":"replace", "sel":"./Quebec/port/@connector", "content":"RemoteNodeService-PeerJS,localid2,delete,3,xhpserver.herokuapp.com,,/"}
  ]
I have edited the two workbooks to allow a number of configurations. The heroku-based server will be selected if you specify "&ver=herokuxhpeerjs" as part of the URL.
Run Canada and then Schweiz. For example:
WebRTC complex Canada 2018
(gist)
(localstorage)
WebRTC complex Schweiz 2018
(gist)
(localstorage)
I successfully tested it with Canada running in a Chrome browser, and Schweiz in Firefox.
Ken Webb
Xholon GWT is a Xholon project. Copyright (C) 2016 - 2025 Ken Webb
  @QWERTYUIk
  OPASmDFGHe
  primordion
  JKLZcXCVB.